

In my world, when a new baby enters the world, one of the many gifts it must be showered with is cupcakes. Cakes are the food of celebrations and a new baby is definitely something to celebrate.
Of course, the new born won’t actually be involved in the consumption of their gift, but the well deserving parents will be, and to be honest the cakes are really just for them.
I’m no stranger to making New Baby Cupcakes as I had made some very similar to these last year for my Nephew, however as the well-known saying suggests “practice makes perfect” and as I get more confident in my cake decorating I’m really happy with how these turned out. I didn’t want them to be exactly the same so added a few new techniques into the mix to give them some difference.
In my previous Baby Boy Cupcakes post, I shared my top tips and advice on working with fondant icing. In this post I will be giving a detailed step-by-step guide in how to create the design.
So let’s get going…
Makes 12 cupcake decorations
Decorating time: 1 hour
200g white royal icing
Icing sugar for dusting
Sugarflair paste colours;
Navy A111
Paprika A118
Decorating Tools
Rolling pin
8cm cookie cutter
Embossing roller
Plastic straw

Preparation, steady hands and patience are my three big musts when working with fondant icing, so with this always in mind I will prepare each piece of decoration in advance before I begin to assemble. I find this helps eliminate any mistakes and I feel completely in control of the task ahead.
For the skin: to make a pale nude colour you literally need no more than a pin head of the Paprika dye. Use too much and you will be making baby Umpa Lumpas, so don’t dive in with the colour, use tiny bits at a time and build it up. Cut roughly half of your white fondant (leave a little white) and knead the colour in so it is evenly mixed then dust your surface with a little icing sugar and roll it out so it 1-2mm thick. For the noses use any excess icing to shape 12 small pieces into balls.
Using your cookie cutter, cut out 12 circles leave place them to one side on an icing sugar dusted surface and out of direct sunlight.
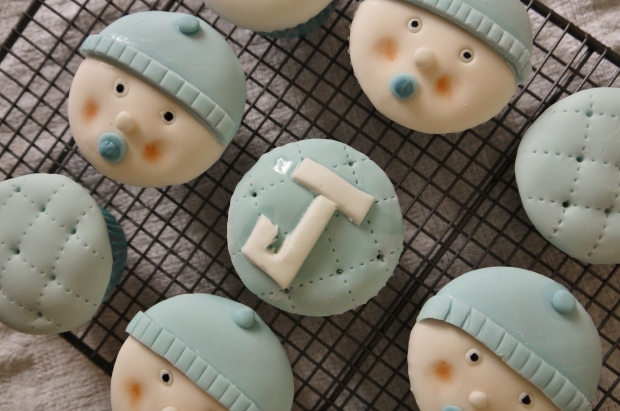
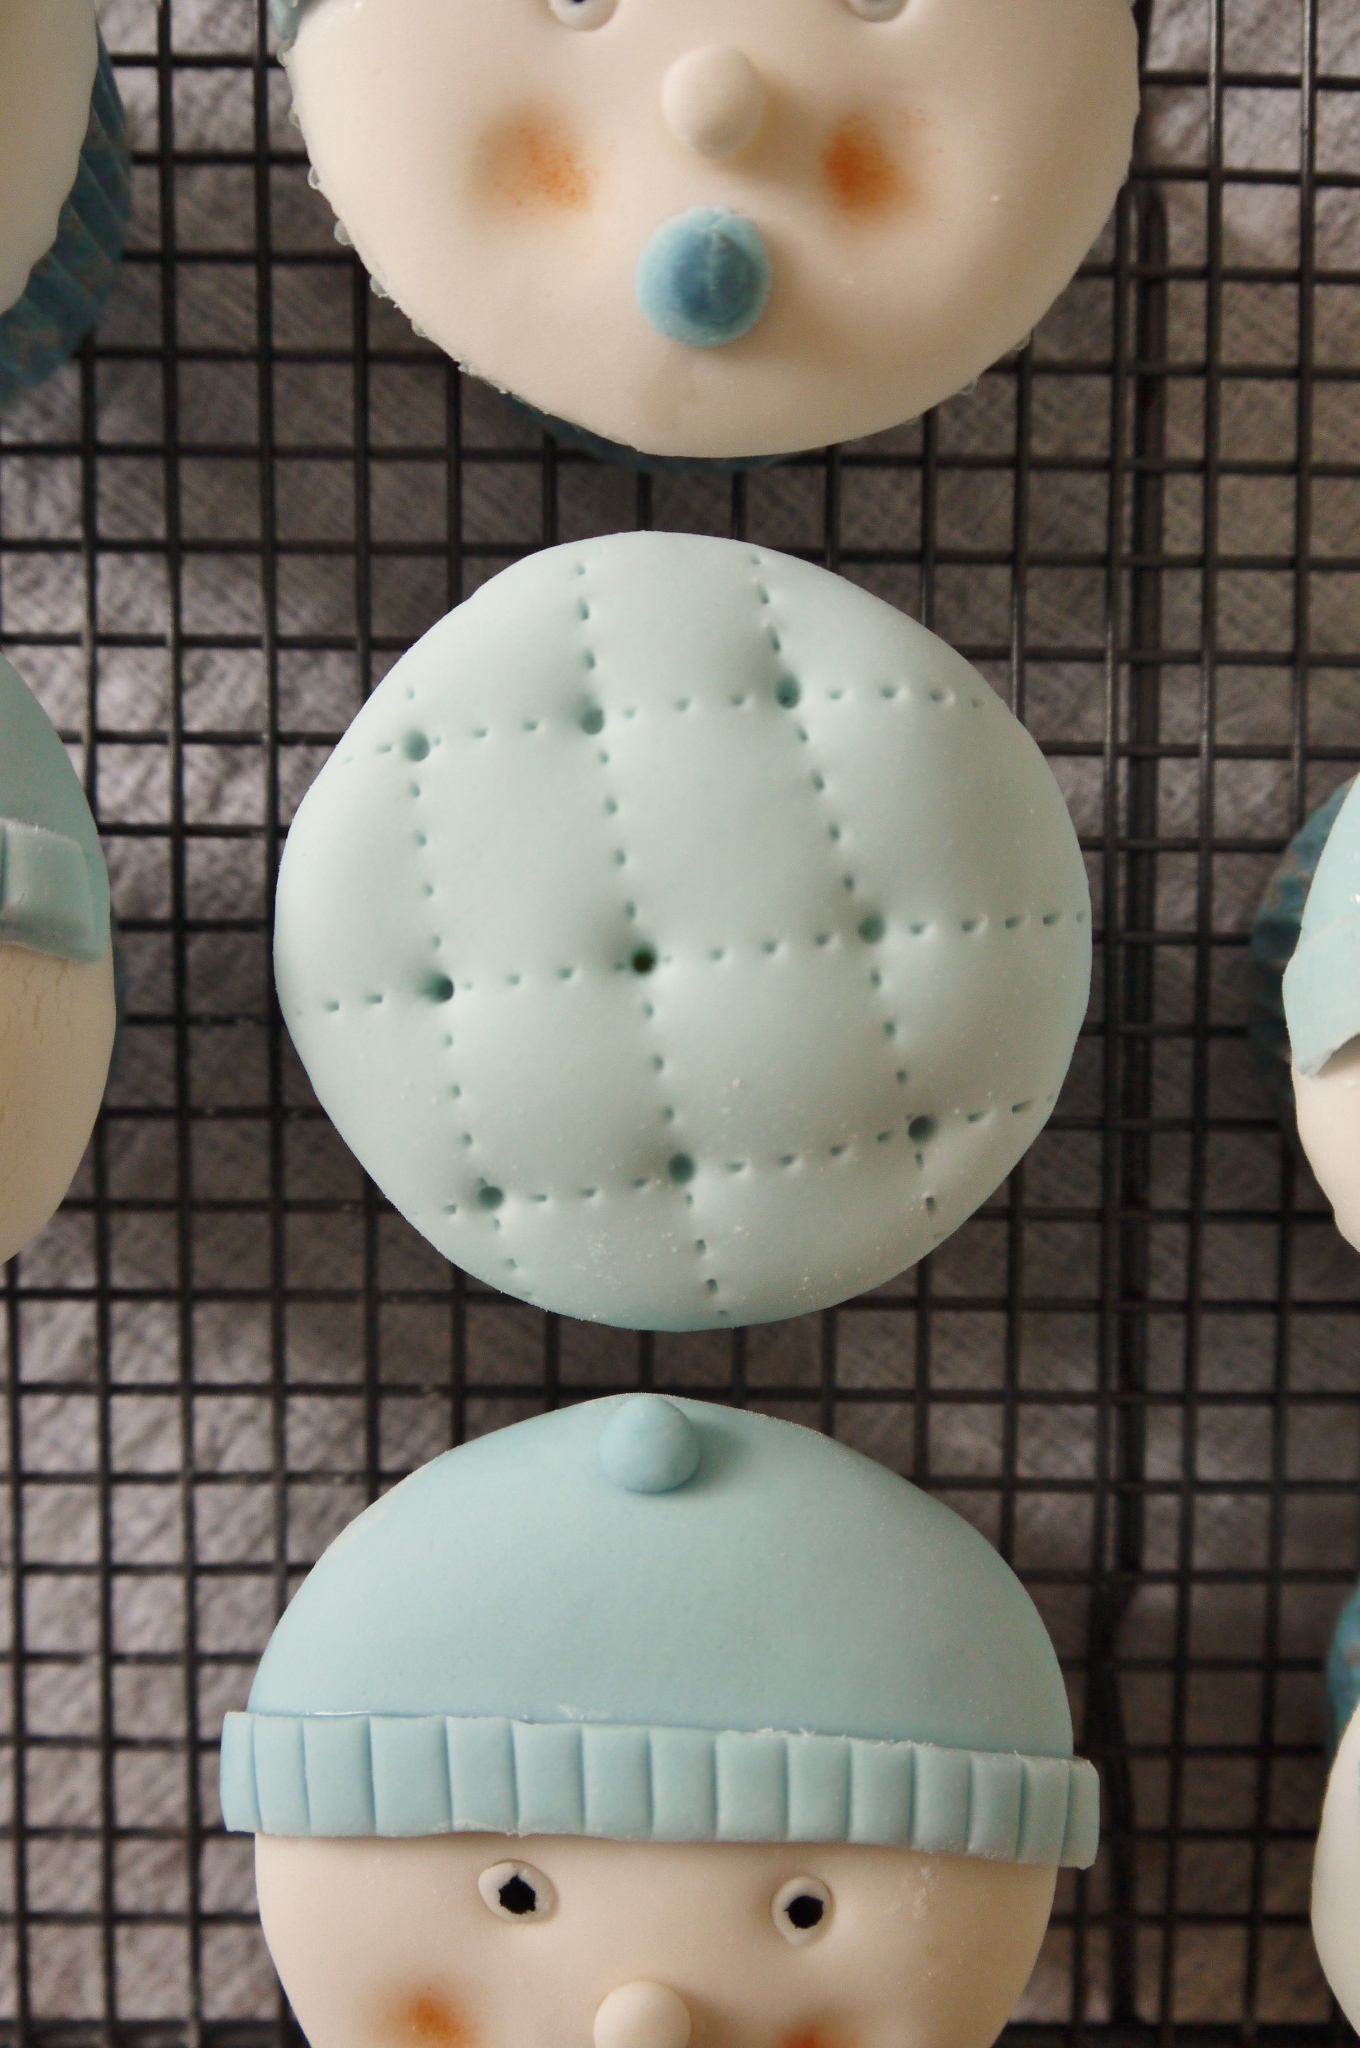
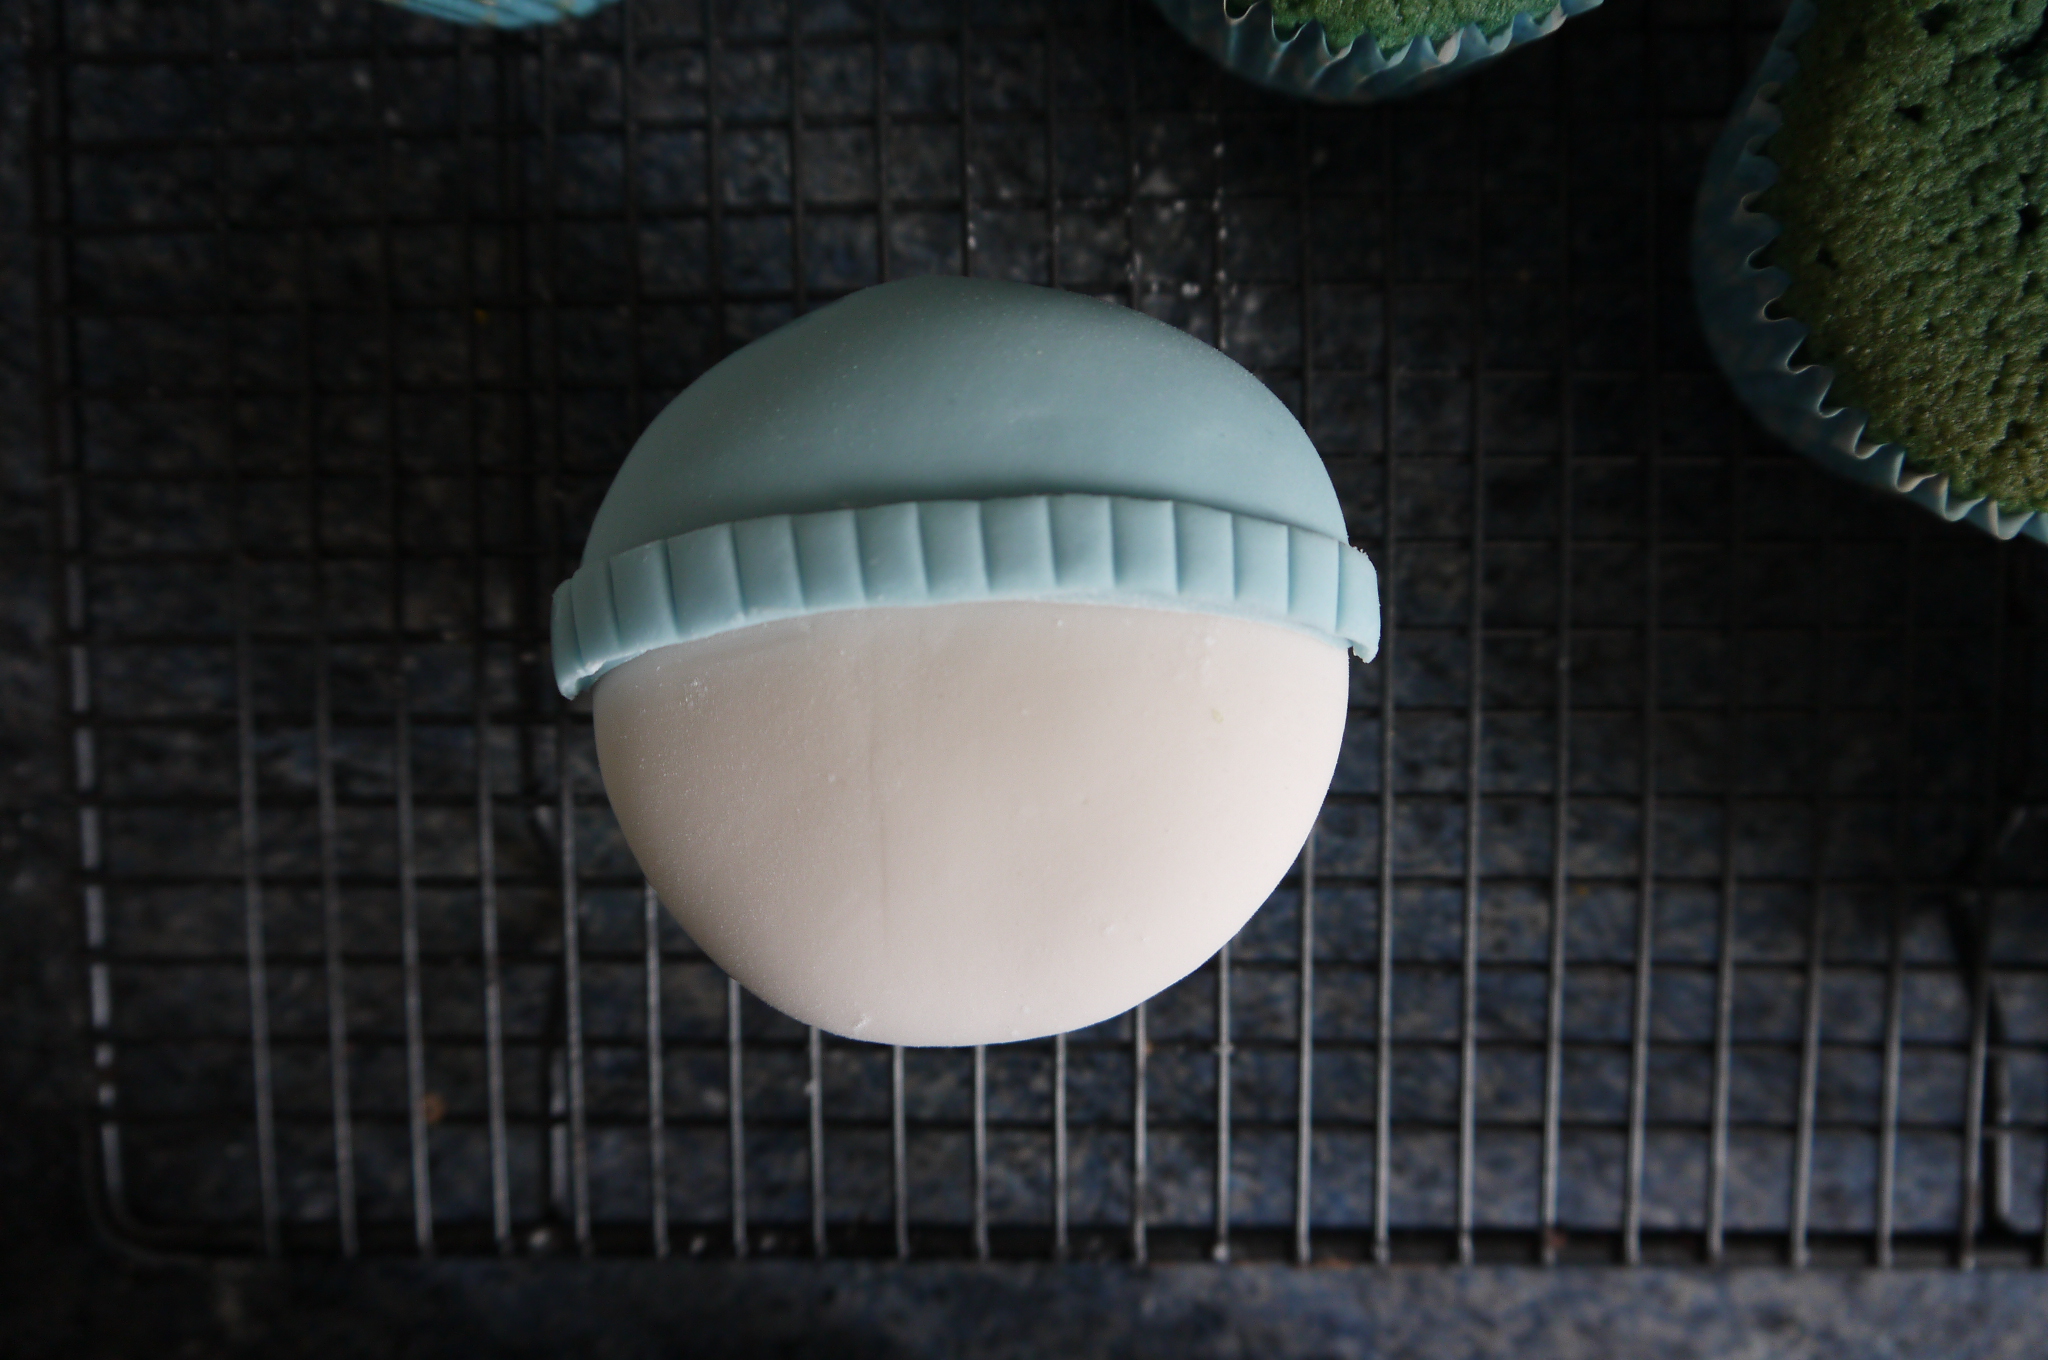
For the hat: Take the other half of white fondant and add little touch of navy dye. Knead the colour in, adding more if required until you have a baby blue colour.
Using your cookie cutter, cut out 6 circles as you did with the skin, then cut each of those in half. Trim 1cm off the bottom of the circle to make the rim of the hat. Using a knife make little indent lines across to give it some detail.
With your excess icing, shape 12 small pieces into balls for your hat bobbles, then another 12 slightly large balls for your dummies.
For the dummies: Flatten the shaped balls into discs. Take a small amount of your blue icing and add a touch more Navy dye to make it a darker blue. Knead the colour in then shape into smaller balls to make the dummy handles.
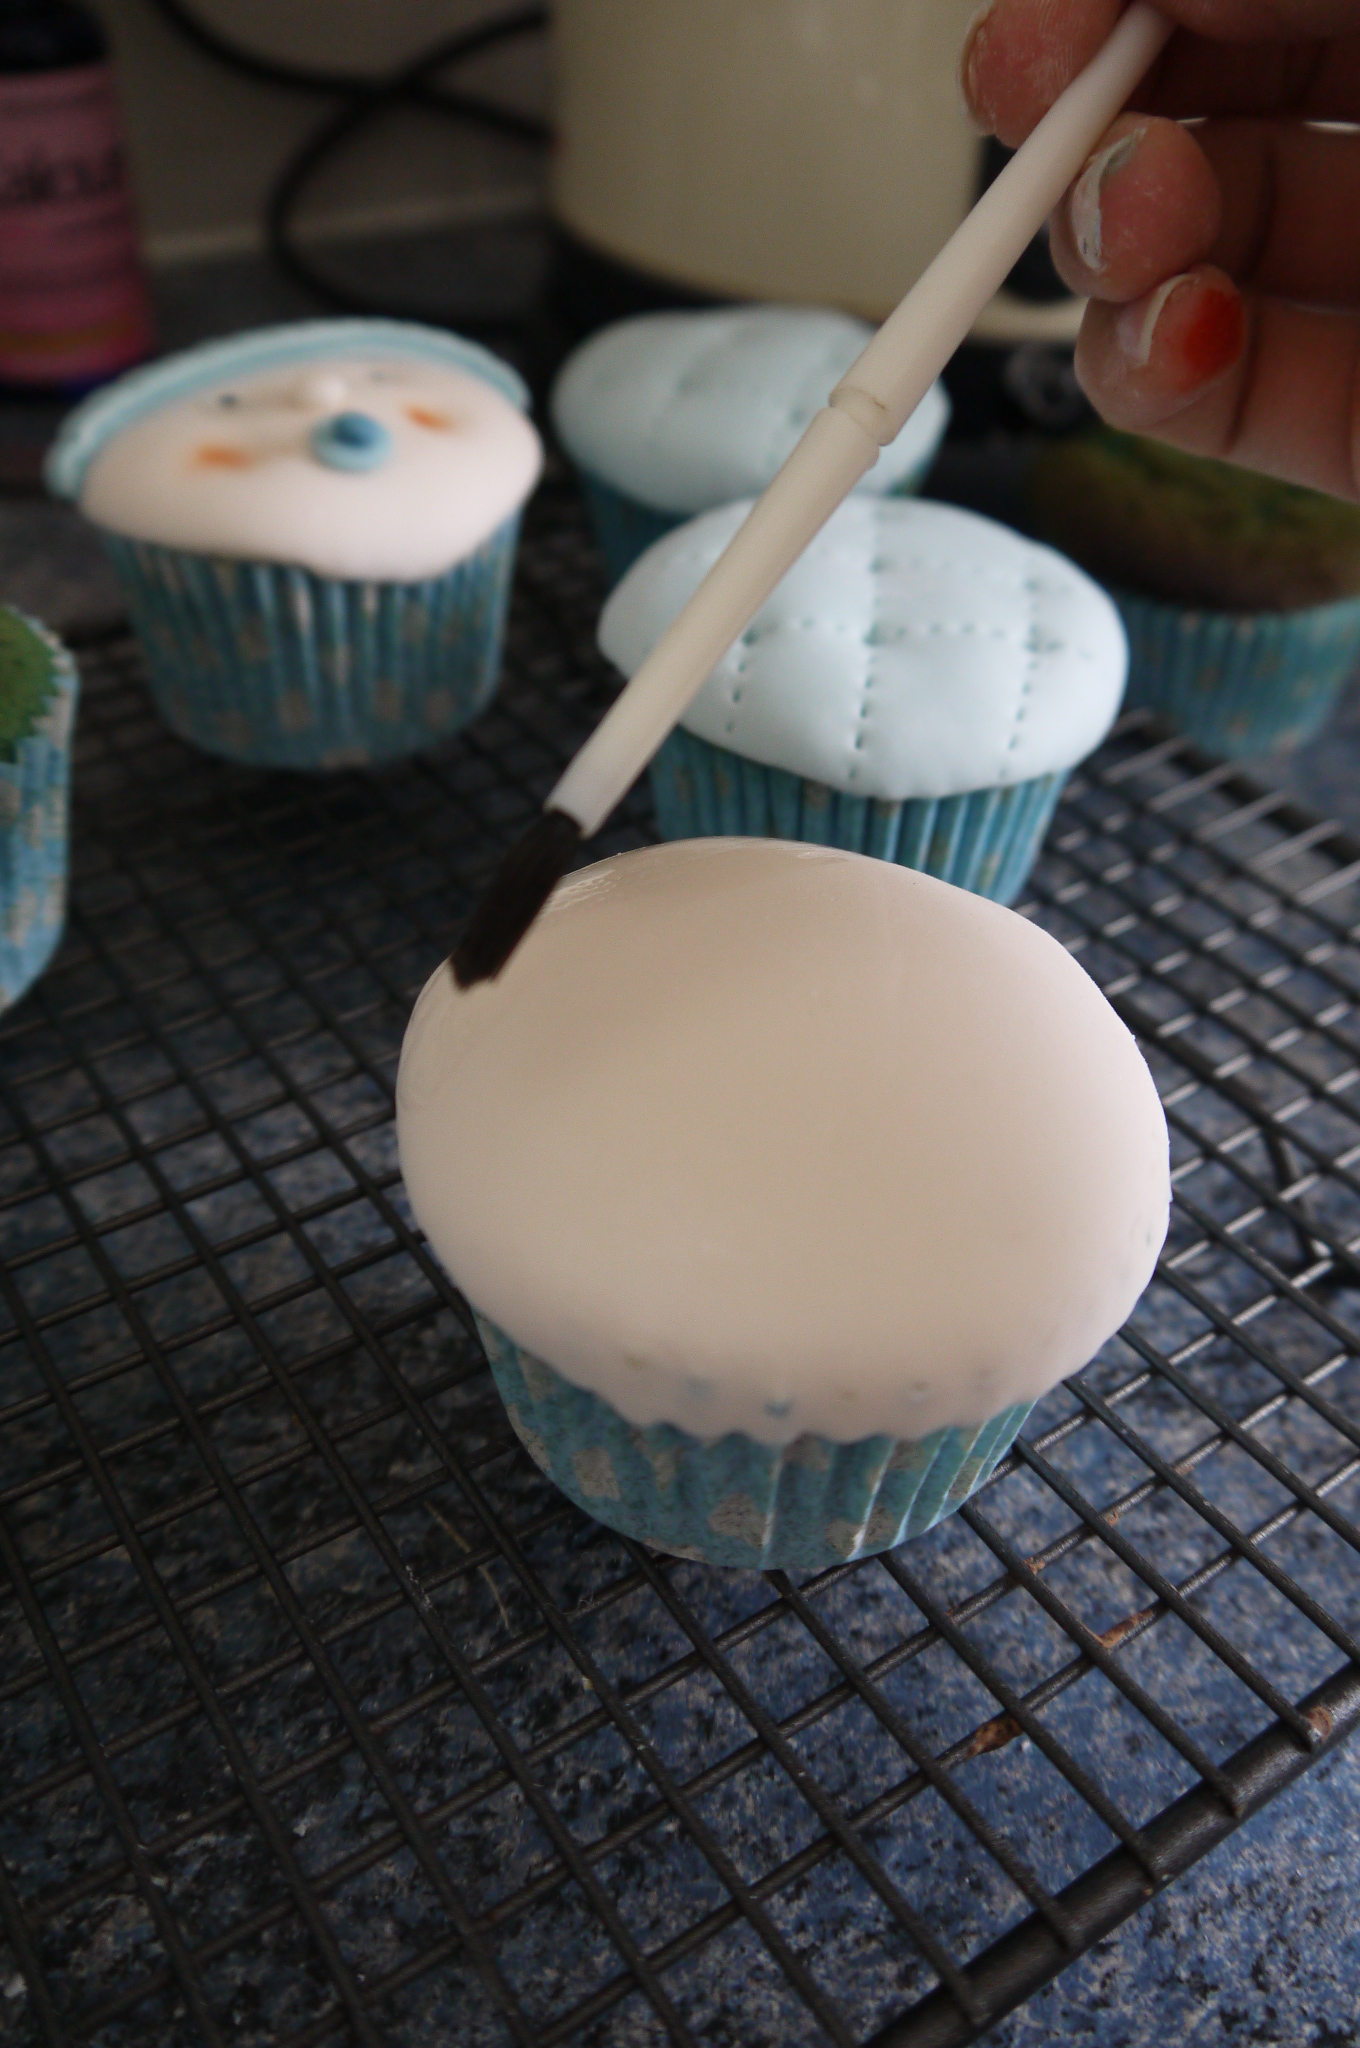
To assemble: Begin my icing each of your cupcakes with a thin layer of buttercream. Try to avoid the sides as you do not want any buttercream spilling over when you lay on your fondant. Next lay your nude circles on top of the cupcakes and smooth them round to the edges of the cupcake cases.

Using a small brush (or your finger) dab some water to the top of your circles to stick on your hats, then dab some more onto the hat to stick on the hat rims and bobbles.
To make your eyes, gently push a small straw into the icing to make indents then push a small piece of white fondant in to each hole. Add colour by dabbing some navy dye onto the white fondant with the end of a paint brush (or a toothpick). Take your small nude balls and stick them just under the eyes for the nose, then your blue discs to stick just underneath for the dummy. The darker blue dummy handle balls can then be stuck on top to give more detail.

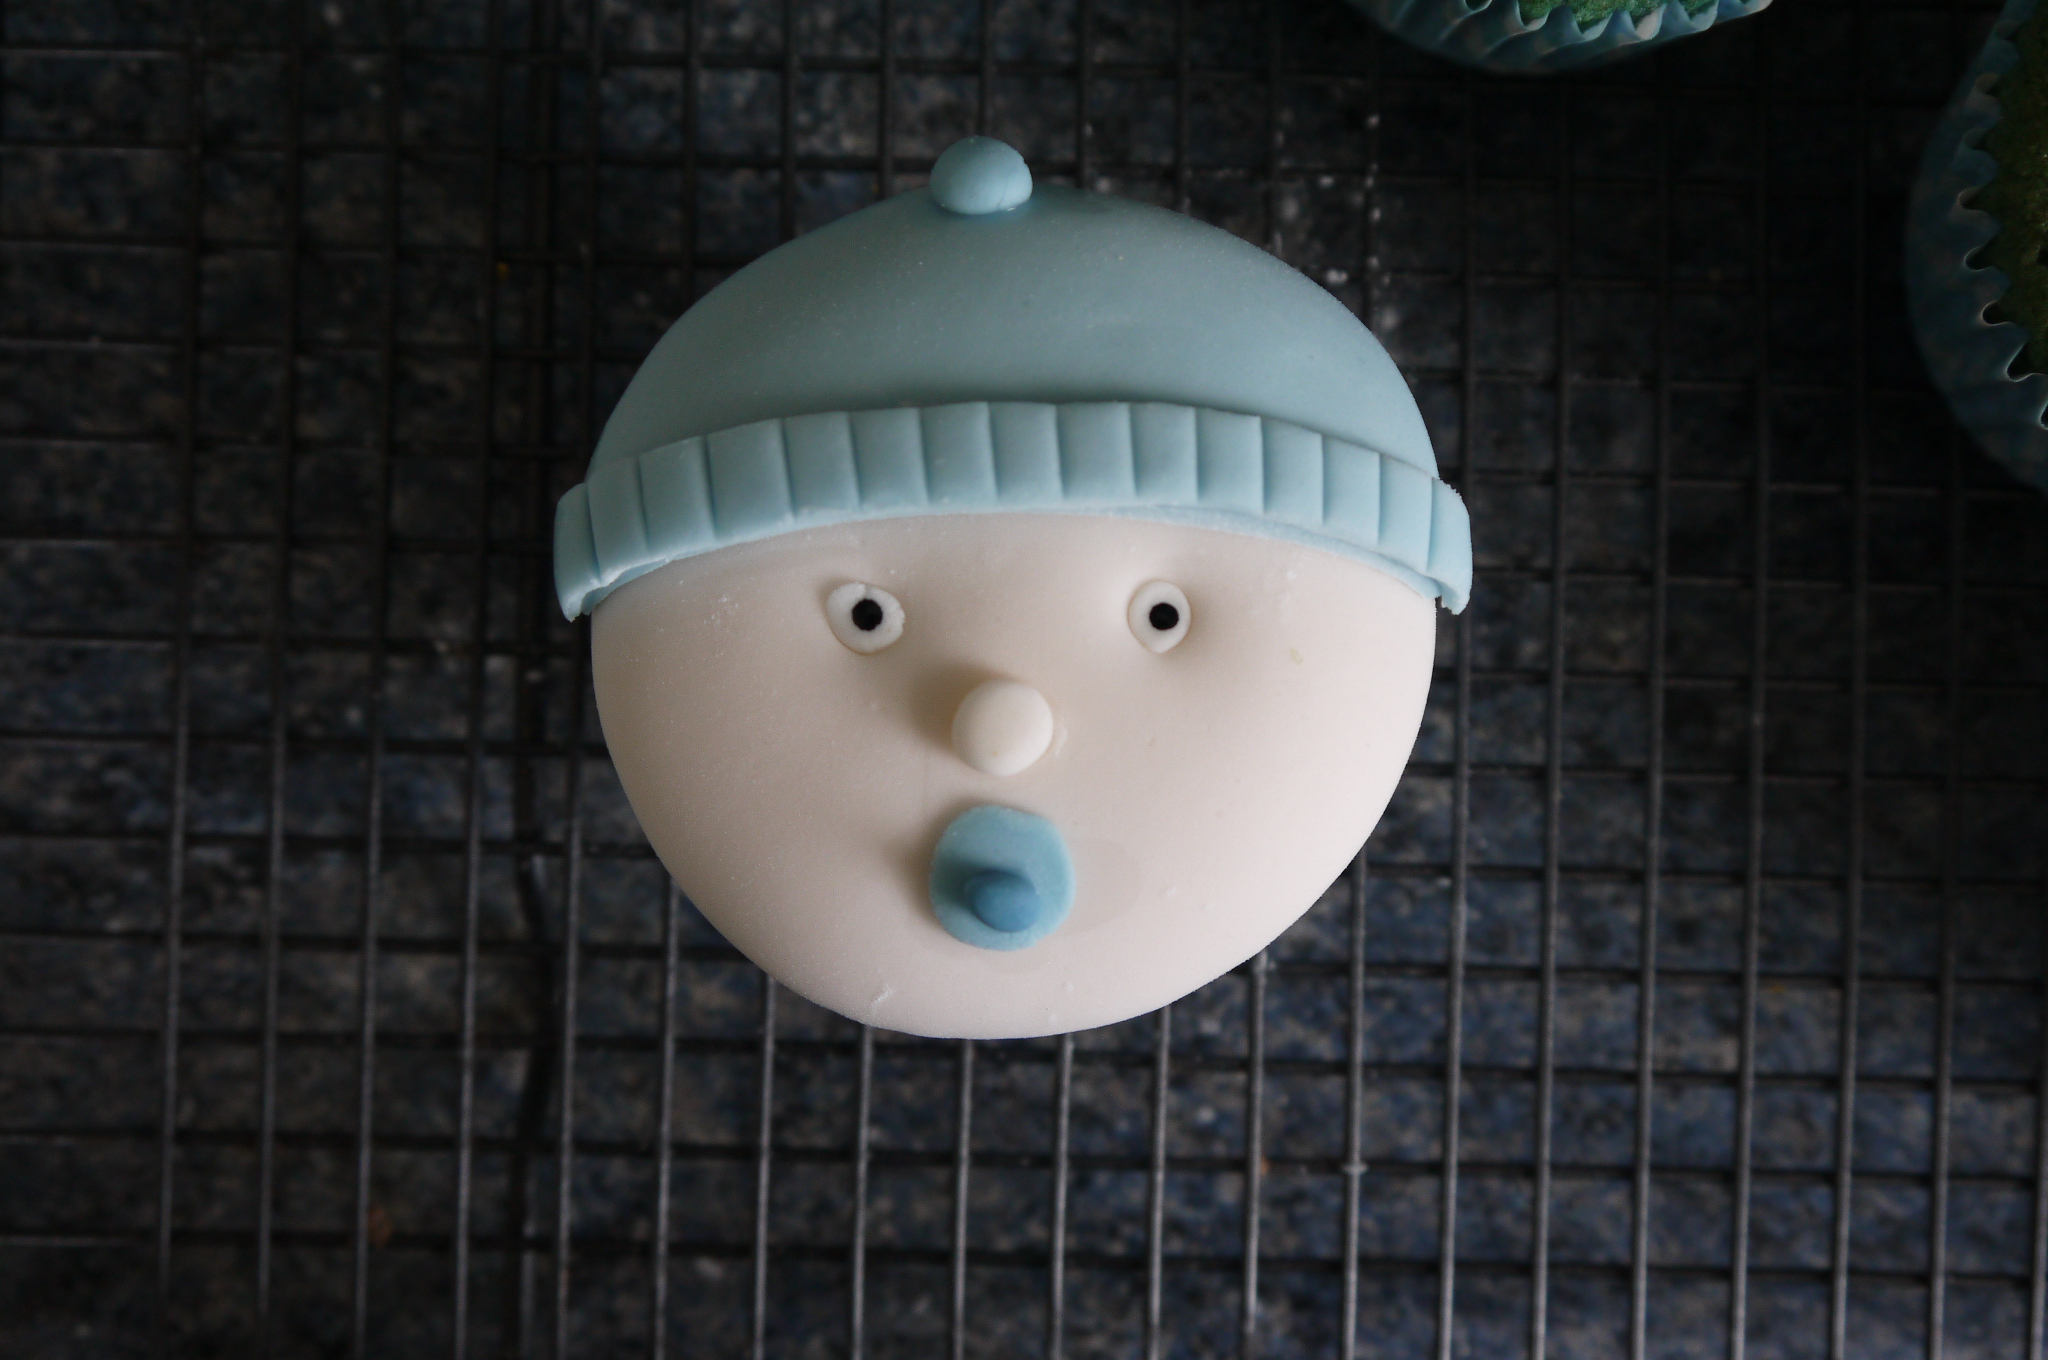
For the final touch, give each little baby rosy cheeks by dipping your little finger into the paprika dye. Remove as much excess as you can by dabbing it onto some left over icing or kitchen roll, then when there is barely anything left on your finger gently rub the dye onto cakes and make them blush.

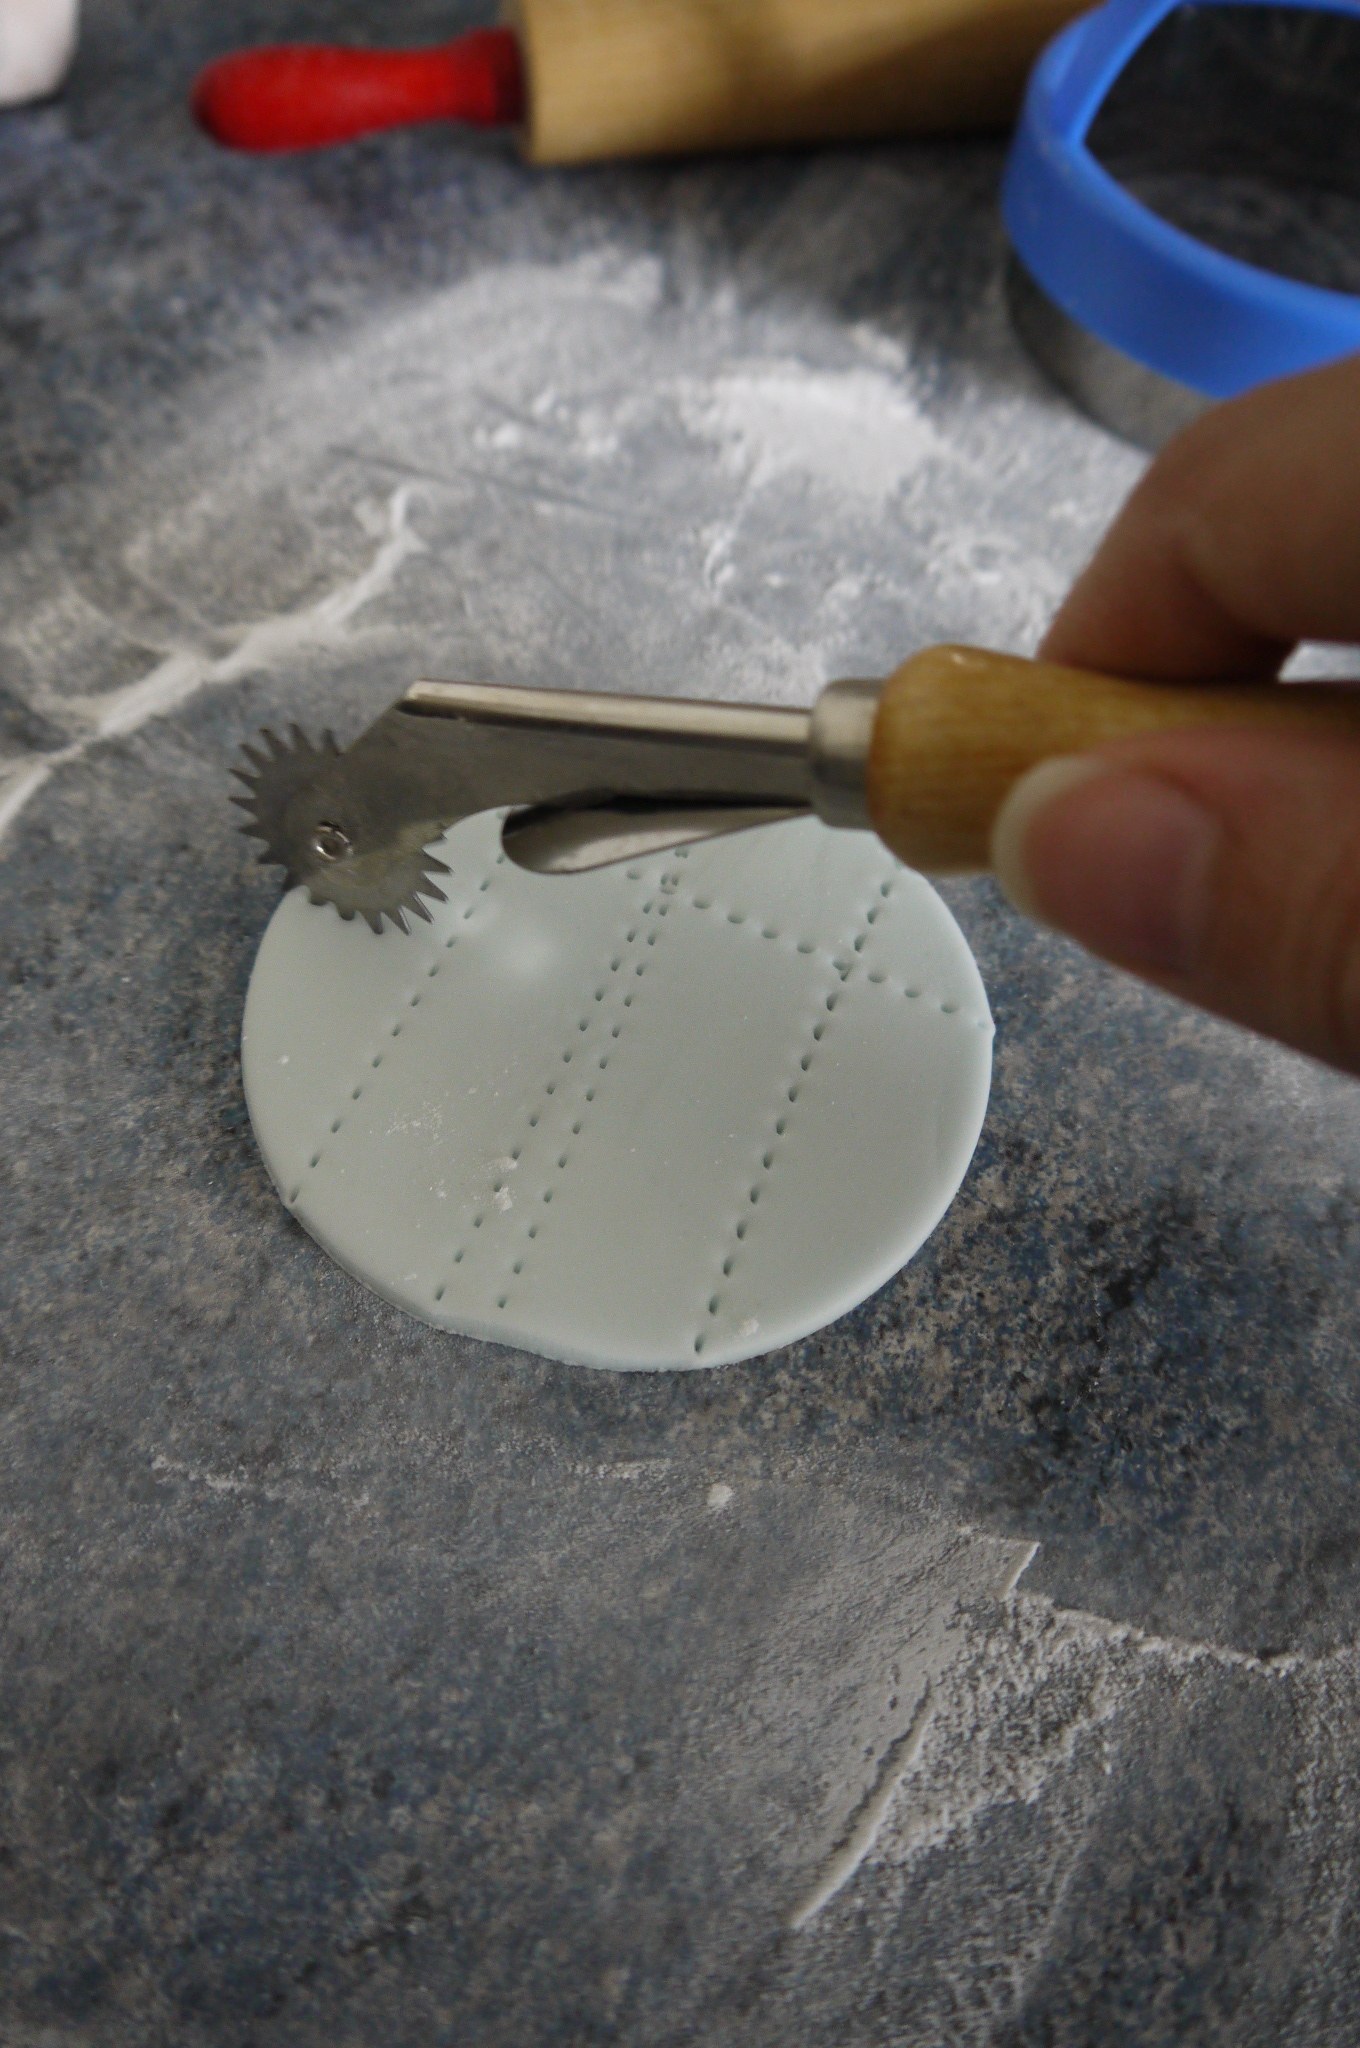
Quilting: Roll out all the excess blue fondant to 1-2mm thickness then cut out into circles. Using your embossing roller, lightly indent the circle with 3 lines horizontally and then again vertically. Lay the fondant onto the cupcake and smooth round, then using an indenting tool, lightly indent the cake where each of the lines meet.


Bunting: Use scraps of the nude and blue fondant and cut out into triangles. Place the triangles in a ‘U’ formation so they resemble hanging bunting.


Shop this post
Embossing Roller Tool – In the Wilton Icing tool set from Lakeland
Cookie Cutter – Lakeland
Navy and Paprika Dye – Sugarflair Spectral Dye


